If you’re new to sourdough or have been baking for awhile, this is truly a foolproof recipe that produces the results every time. Get ready to learn the step-by-step process of making a crusty, warm, delicious sourdough boule! It is NOT as complicated as you might think and I have all the confidence in the world that you can do it!! After all your hard work you can enjoy your bread dipped in soup, toasted with melted butter, an open-faced sandwich, with eggs, as French toast, with melted cheese, and more!
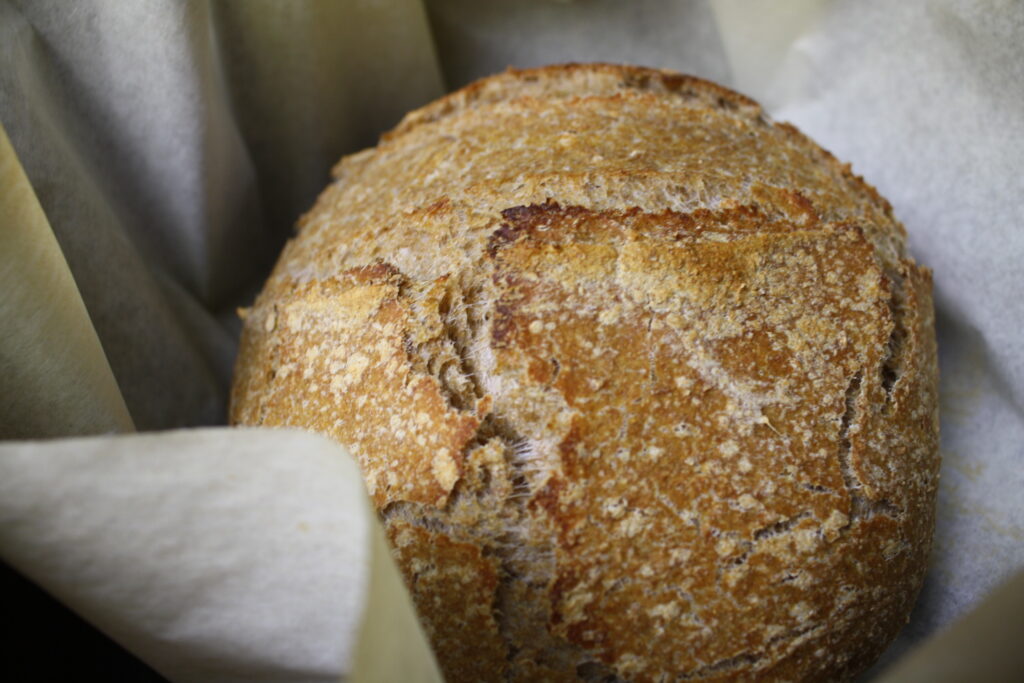
I will be the first to admit, starting sourdough for me was a very long trial and error process. It took an entire year before I could consistently bake a decent sourdough boule that had risen well and was pleasant to eat. A wonderful cousin gave me a basic recipe that was the turning point in my baking, and it’s this recipe that I’ve been able to tweak over the years and make into my very own. You’ll find that it’s a super simple process and if you have a bubbly and active starter, should work every time!
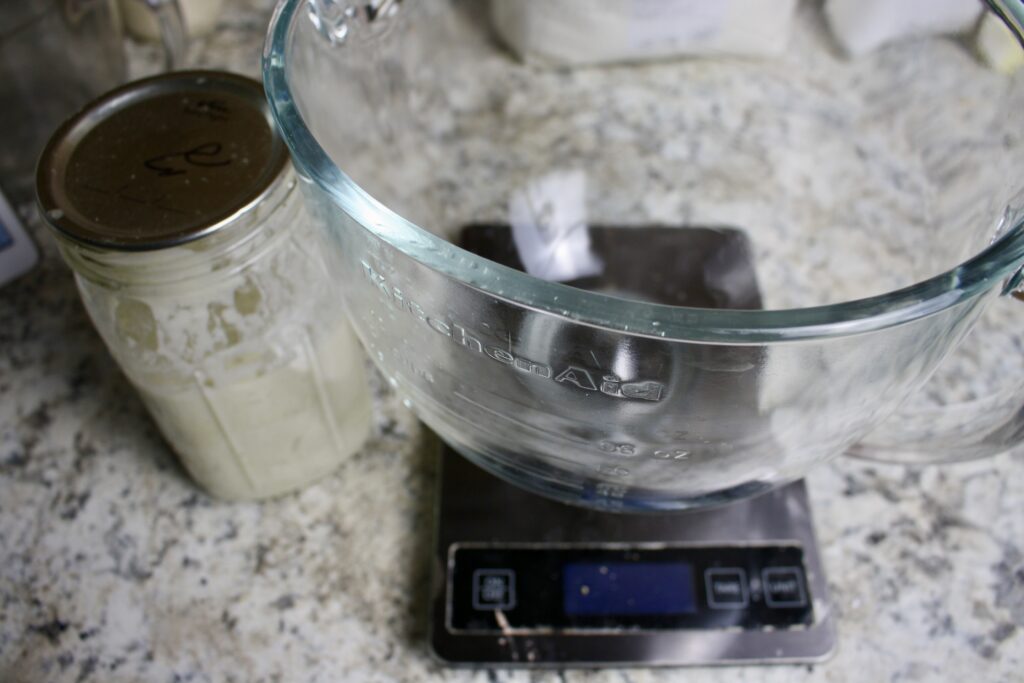
what will you need?
All you need to start is four ingredients!
Water, active sourdough starter, salt, and water.
-What is an active starter?? In short, an active starter is one that is has been fed probably 5-10 hours before with flour and water and has risen and is bubbly.
-You’ll know your starter is active and ready if it floats in a bowl of water
Baking supplies: kitchen scale, stand mixer with dough hook or handheld mixer with dough hooks, parchment paper, dutch oven or substitute.
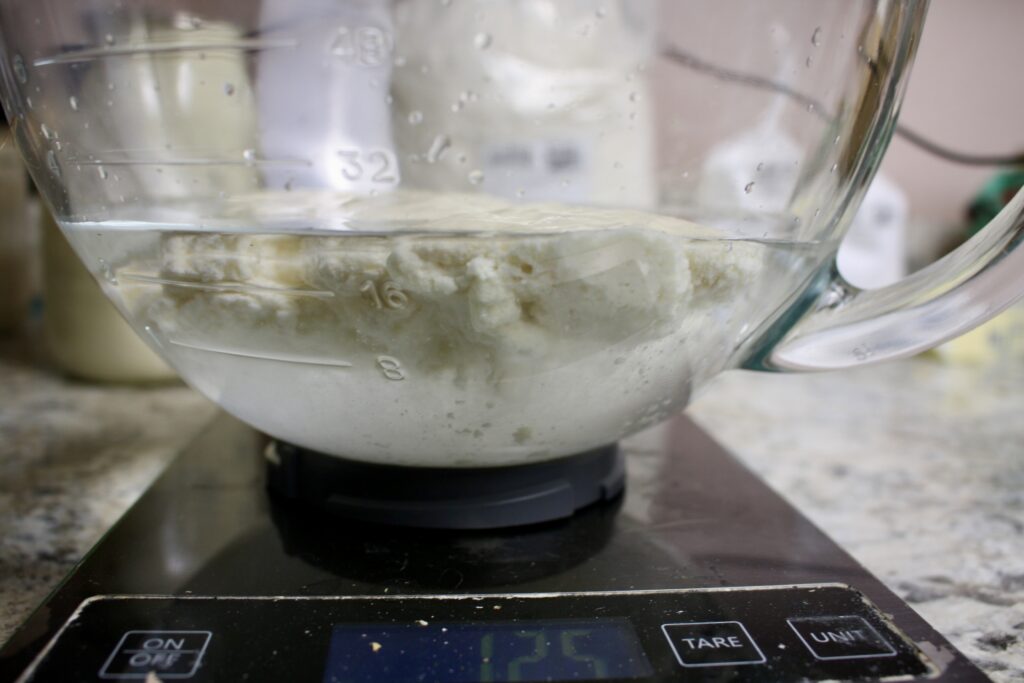
a note on autolyse
Autolyse is pretty simply letting your water and flour mix and sit before adding the other ingredients. There’s much that can be read on the subject but for our purposes I would recommend to autolyse for an hour or two depending on how much time you have.
When I was very new to sourdough, I would autolyse no matter what. After baking for years, I totally acknowledge the benefit but tend to neglect this step due to time. I’m sure professional bakers would disagree but I’m going to say an autolyse is optional. Sometimes the home baker just need things simple.
steps to make your sourdough boule
The easiest way for everything to mix properly is to add the liquids to your bowl first. So, add about 620 grams of water and 130 grams of active sourdough starter. Remember, if it floats it’s good! Next, add 14 grams of salt and about 800 grams of flour… this can be any combo of all purpose, whole wheat, or freshly milled flour.
Tips-If you’re using all white all purpose flour you’ll probably need a little more than 800 grams. If you’re using a mix of all-purpose and whole wheat or milled it will be about spot on. If you’re using all freshly milled you might need a little more water. It all depends on what flour and how absorbent it is.
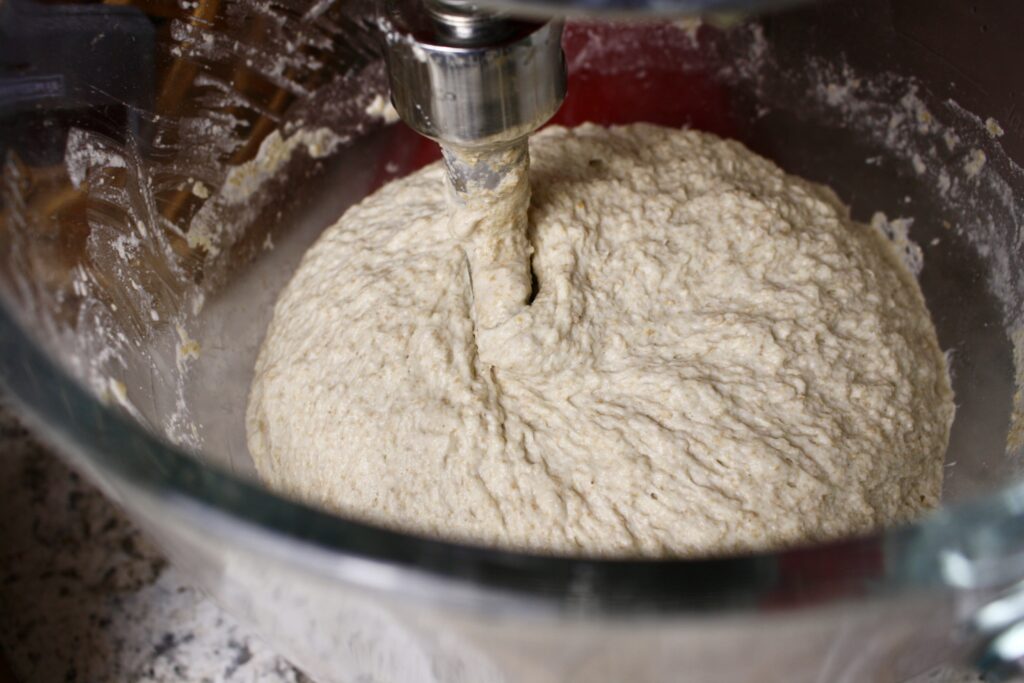
-With practice you will be able to know what the consistency of the dough should feel like in order to produce a beautiful loaf. It should NOT feel watery, or too dry. After mixing it should hold together somewhat if you grab some dough and pull up. In the steps below we’ll see how the gluten binds together and gets stronger throughout the process.
-When I say “about” for the gram measurements it means I think it’s fine give or take 5-10 grams… I’ve made hundreds of loaves over the years and it really doesn’t have to be extremely exact. Like I said before, as you practice you’ll know how to dough should feel.
mixing your dough
After all your ingredients are in your bowl, it’s time to mix! Put your bowl under a stand mixer and mix on low to med for about 5 min. You might have to use a spatula and scrape the dough off the sides. If you’re using a hand mixer with dough hooks mix until the dough comes together into a ball.
next, stretching and folding!
Below, I’ve shown pictures on how to stretch and fold the dough and what it should look like when finished.
Steps to stretching and folding the dough- pull the dough up as far as you can without breaking it, then fold it across the top of the remaining dough.
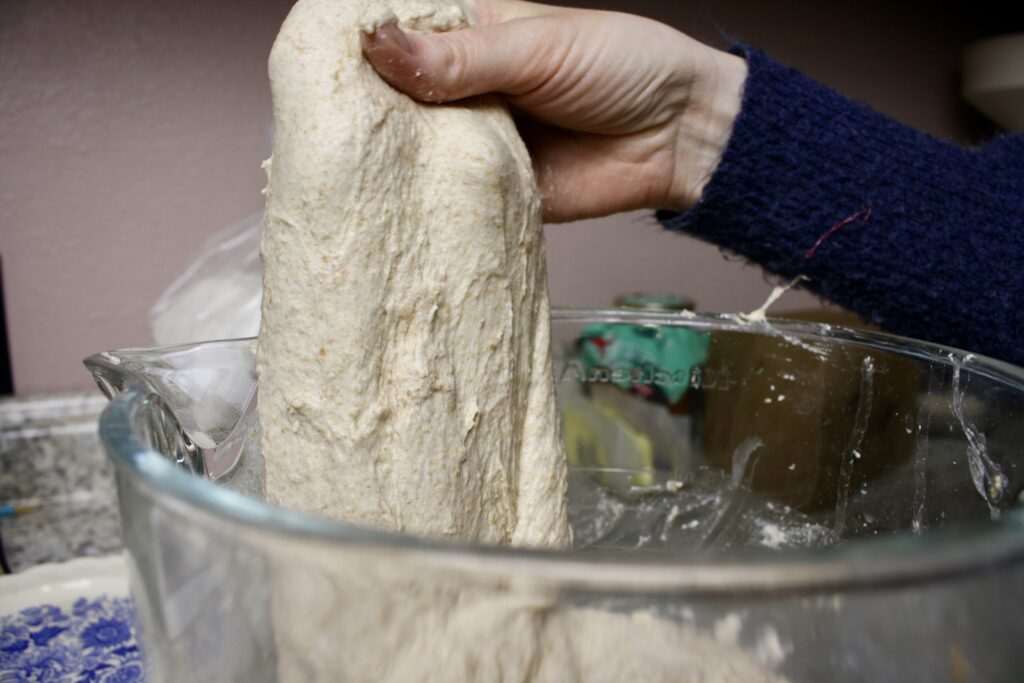
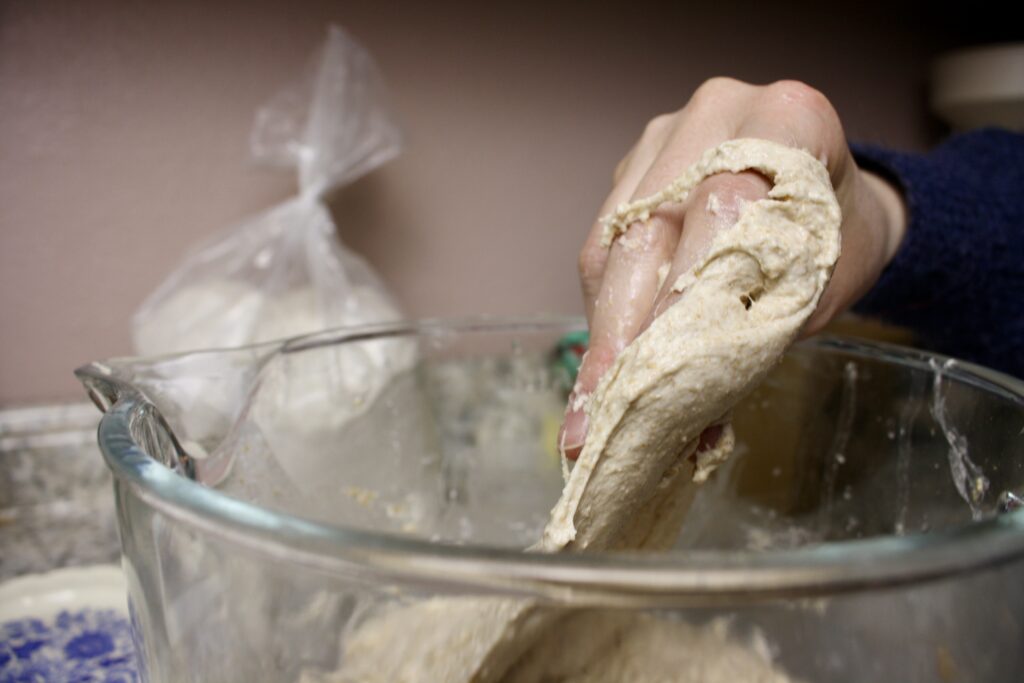
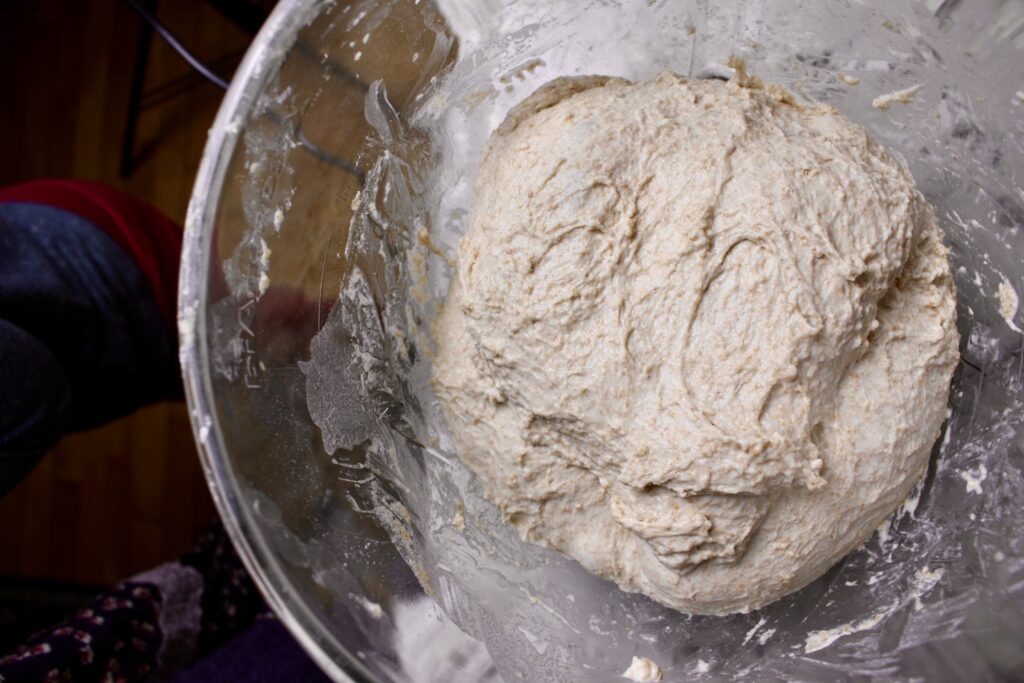
What does stretching and folding do?? It improves the strength of the dough, develops the gluten, and will be what helps it be elastic and rise while baking.
You’ll need to stretch and fold 3-4 times every 30-45 min depending on the flour you use. When it’s “ready” it will stretch upwards without breaking and look like a stained glass window.
bulk fermenting your sourdough boule
The bulk ferment is what’s going to allow your bread to develop the gases for it to rise while baking. It’s when the yeasts in your starter can eat the gluten, produce gas, and rise over a period of several hours. If you’re used to making bread with quick yeast it will take more patience for this! Depending on the temperature of your home it could take anywhere from 6-12 hours for the bread to rise ( I like to do the bulk ferment overnight- but not in the summer). It will not look the same as a yeasted bread or look like it has risen as much as a yeasted bread would. You can tell it’s ready to be cut and shaped if it has risen substantially but still holds together just like when you were stretching and folding. Side note: If it’s liquidy and going flat, then it’s unfortunately not going to be a sourdough boule, it’s over-fermented and you can just make a big flatbread. No need for waste here!
Ok, so, for the bulk ferment just cover the bowl with plastic wrap or beeswax wrap and let sit on the counter for those 6-12 hours.
after the bulk ferment- shaping your dough
After the bulk ferment, scrape the dough onto the counter and cut in half.
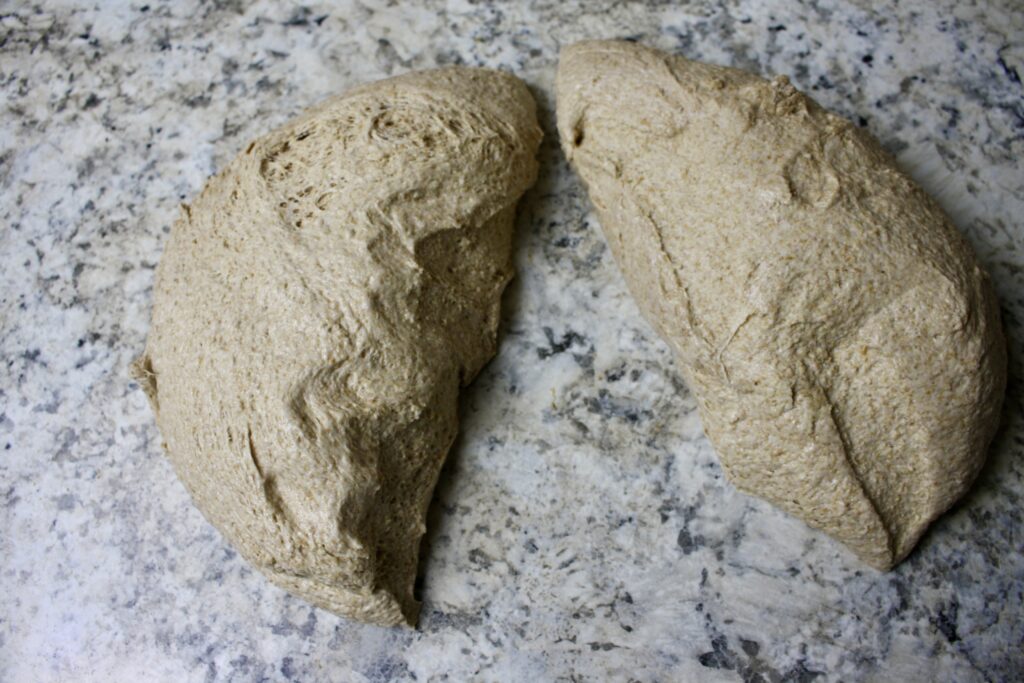
One at a time, shape your dough into balls like this:
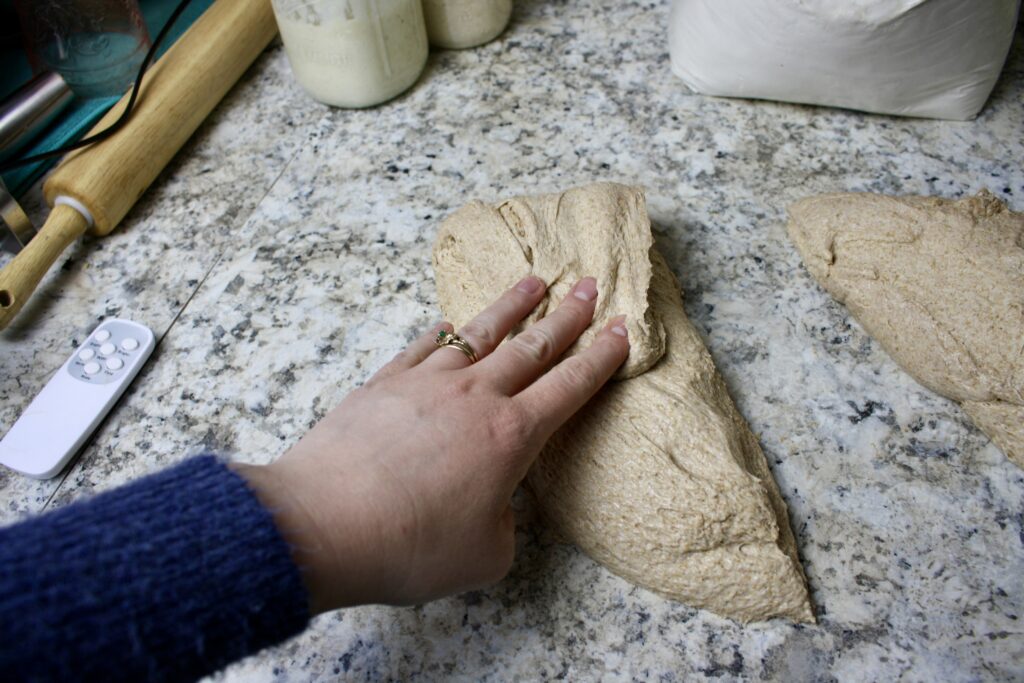
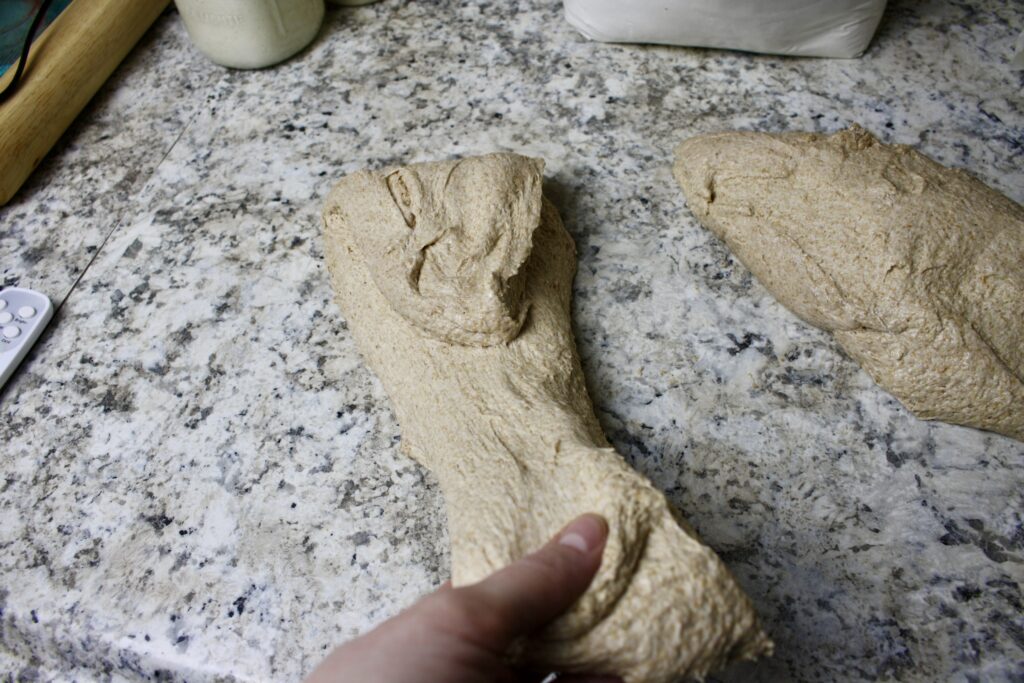
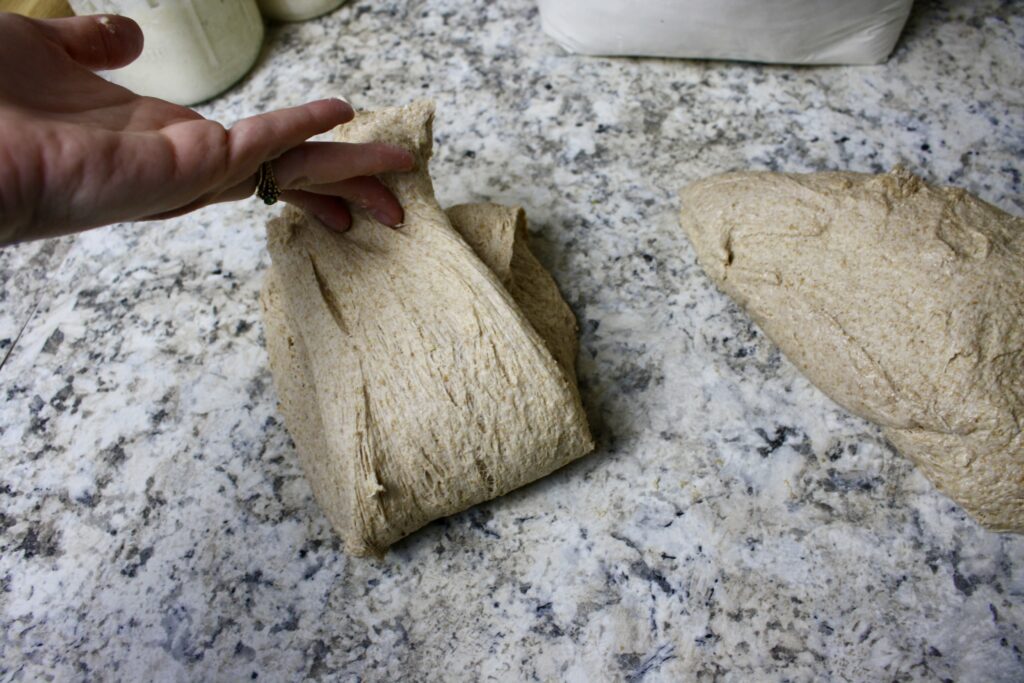
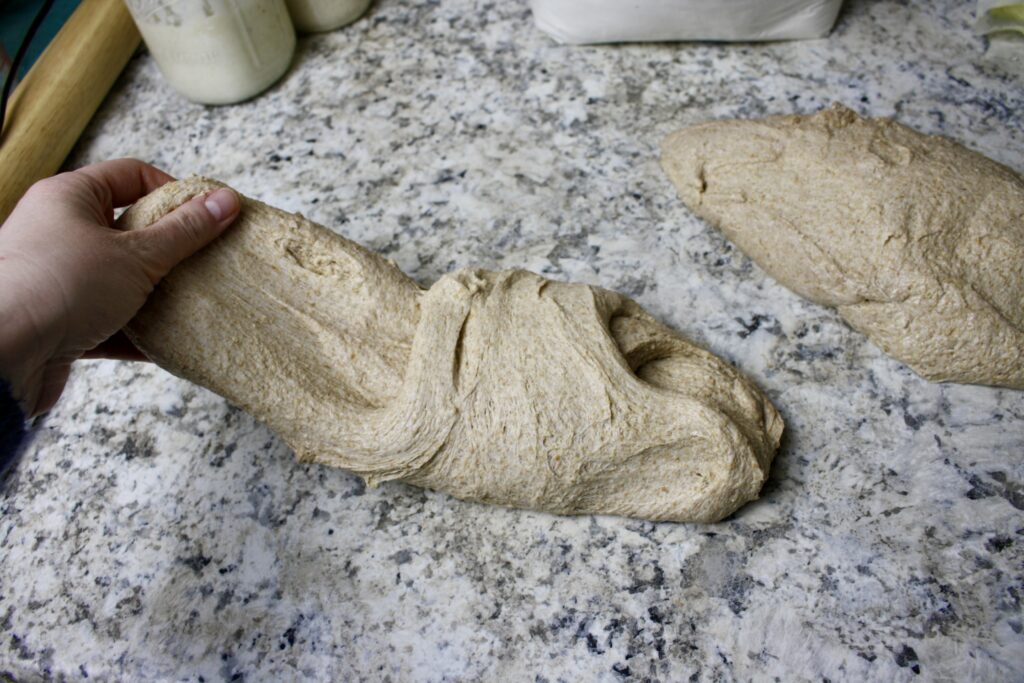
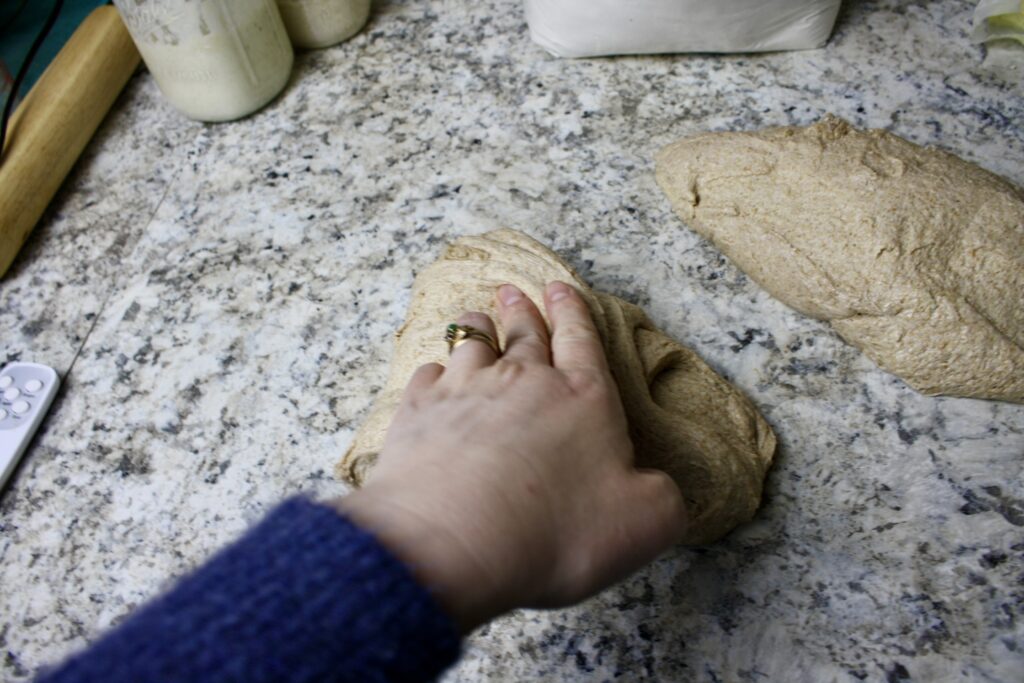
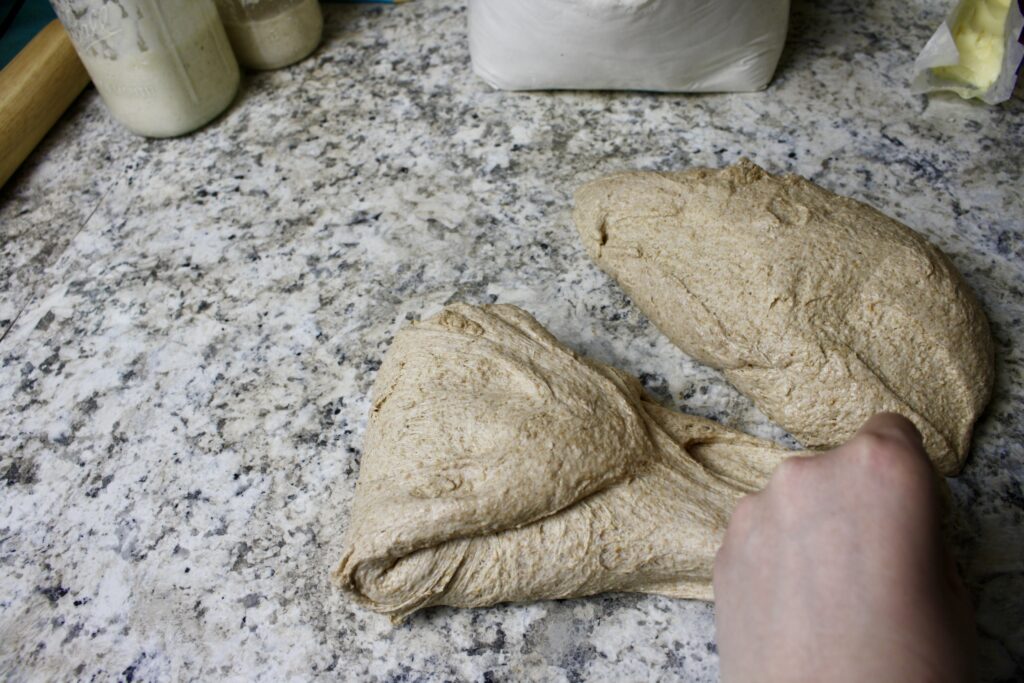
Now, flip the dough over and, tucking in the sides, pull the dough towards you creating friction that causes the dough to “catch” and shaping itself essentially. This technique will create a the firm, round loaf that will hold together.
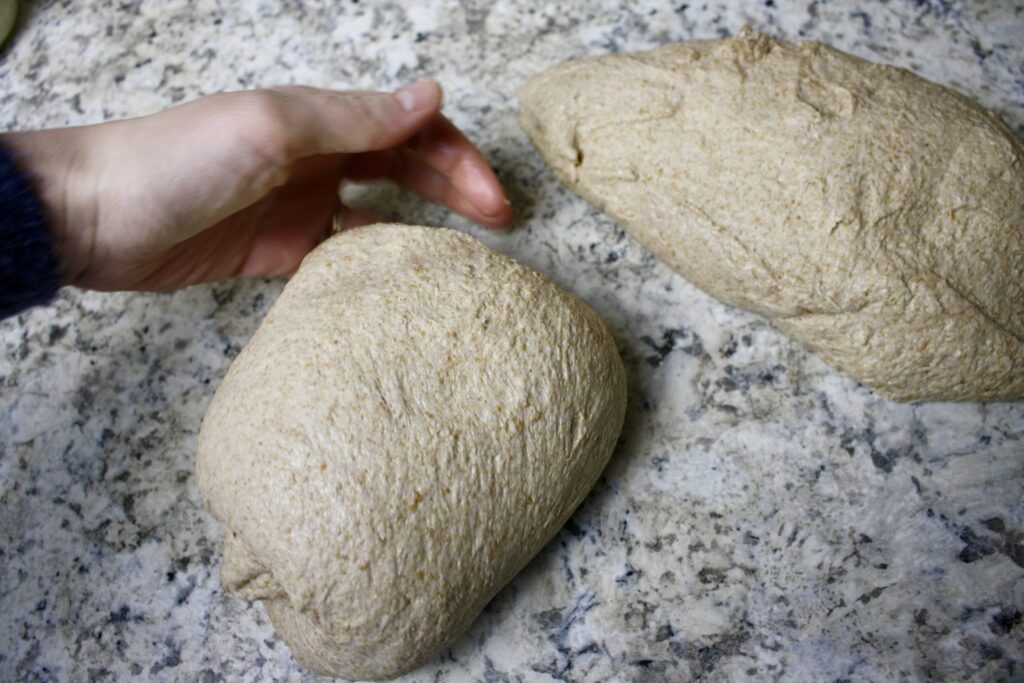
After shaping, set in a heavily floured (I use semolina) banneton or a bowl lined with a tea towel. You can also coat the outside of your bread with seeds or dried onions or garlic if you’d like for a super lovely and savory loaf. Put your loaves in the fridge overnight or for at least 4 hours.
second fermentation
You could also forgo the second ferment in the fridge and go ahead and bake your sourdough boule right after the bulk ferment. I do recommend the second fermentation but you can still get a wonderful loaf if baked at this point.
Score your bread and bake at 450 F for 25 minutes covered, and 10-12 minutes uncovered. The dough needs steam to rise and get a nice crust which is ideally achieved by using a dutch oven with a lid. I love to use a double dutch oven for sourdough! The lid is convex enough that it allows a loaf to rise unhindered. Place your loaf on floured parchment paper so you can lower it into your dutch oven with ease.
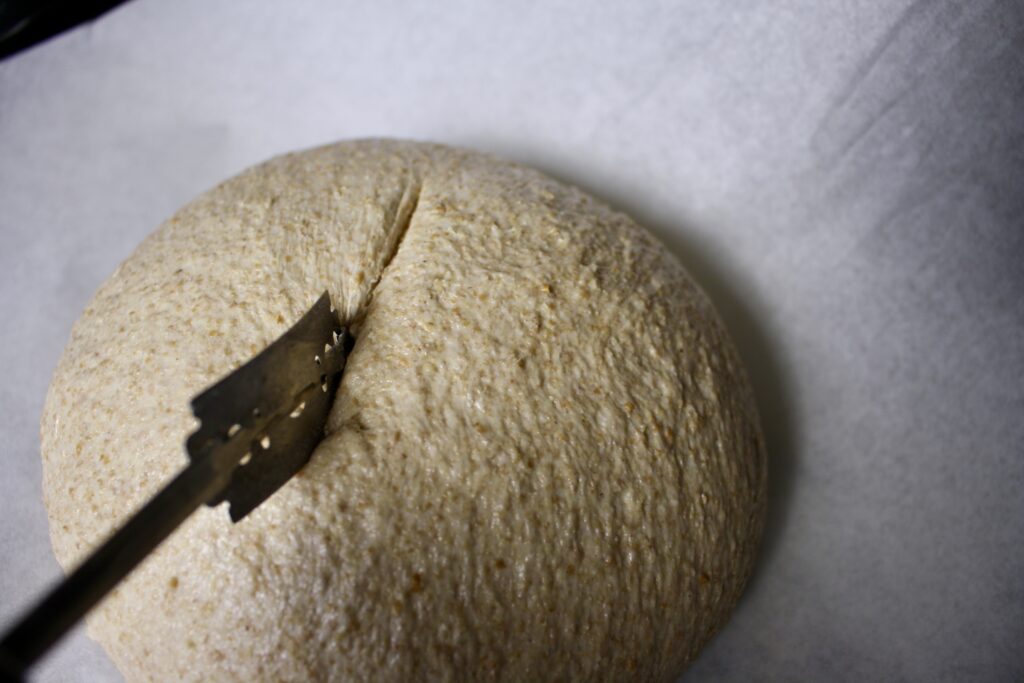
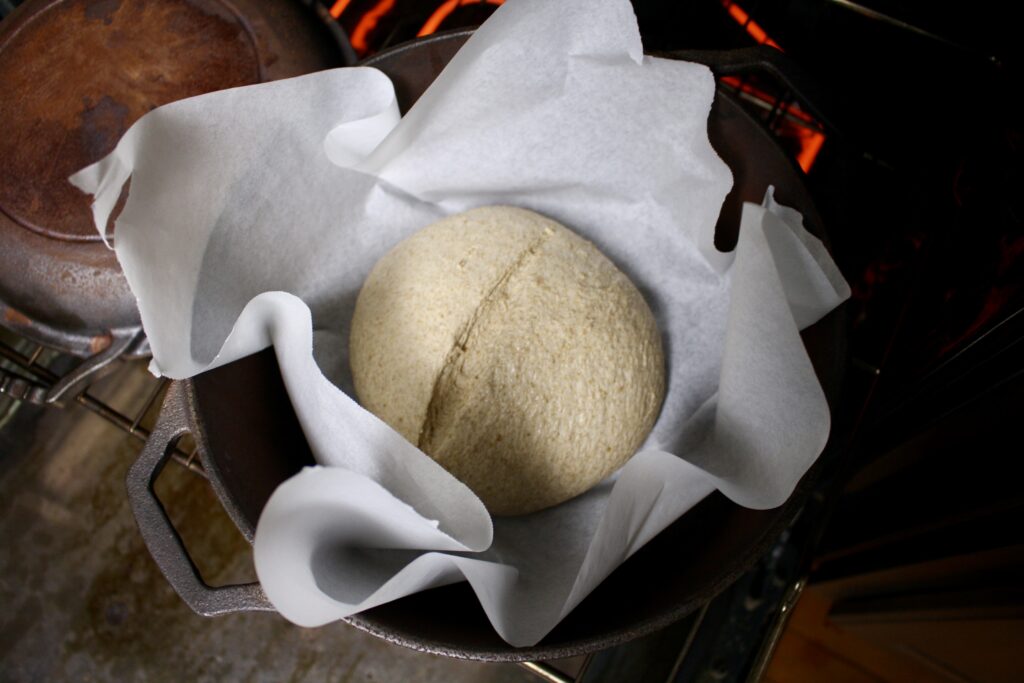
*If you don’t have a dutch oven here are some other ideas:
a baking stone with a roaster pan over it, functioning as a lid- just make sure it’s tall enough
bake your loaf on a parchment paper-lined cooking sheet with a pan of boiling water on the oven rack under it
Please let me know if you try anything else and it works for you!!
When finished your bread should look something like this:
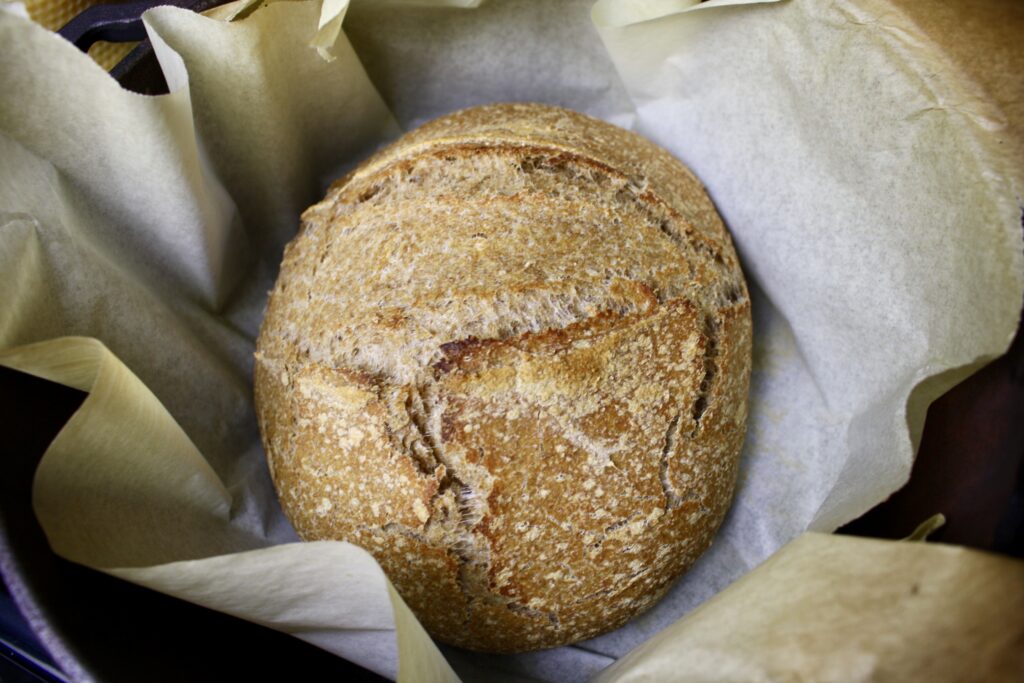
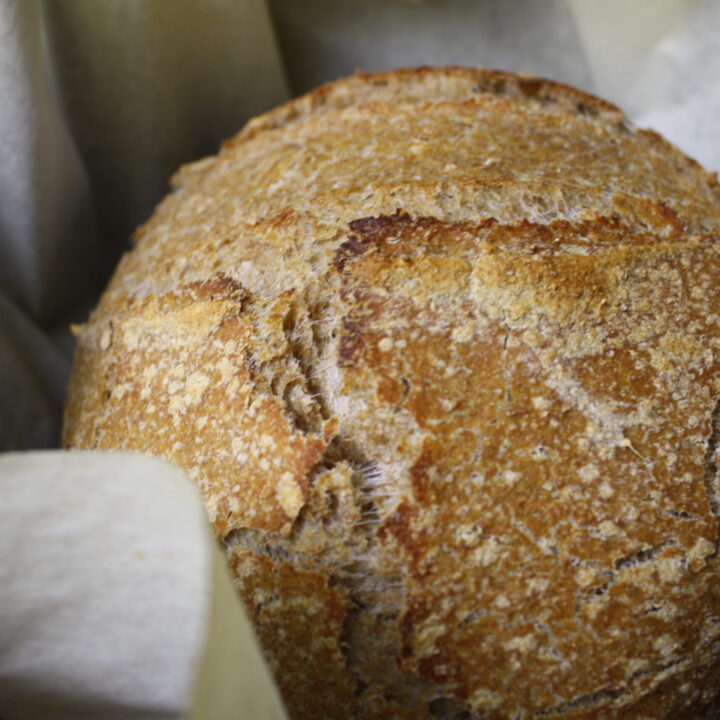
Nice and crusty on the outside and soft on the inside. Your sourdough boule is done baking when it reaches an internal temperature of at least 200F.
If you would like to set yourself up to bake sourdough try some of these products:
AND, be sure to try this loaf with:
Swedish meatballs and Scandinavian cucumber salad
basic sourdough boule
an easy to follow sourdough recipie that gets results every time
Ingredients
- 800 grams flour
- 620 grams water
- 130 grams active sourdough starter
- 14 grams salt
Instructions
- using your kitchen scale add the water first, then the sourdough starter
- next, add flour and salt
- with your stand mixer on low/med mix for about 5 min, pushing the flour down from the sides (if using a hand mixer, mix until dough forms a nice smooth ball)
- allow dough to rest for about 20-60 min
- stretch and fold the dough 4-8 times or until you can't pull it up without breaking it, let sit for 20-60min (do this process 3-4 times)
- bulk ferment- let dough rest covered on countertop for 6-12 hours- rising time will depent on the temperature of your kitchen
- cut dough in half and shape it into balls, place into floured bannetons
- cover dough and place in fridge for 4 hours or overnight
- preheat oven with dutch oven or baking stone inside 450F
- place dough on floured parchment paper and set gently into dutch oven and cover with lid (if you don't have a dutch oven see notes)
- bake 25 min, take off lid and bake another 10-12 min
- the bread is done when the interior temperature is at least 200F
Notes
if you don't have a dutch oven you can alternately use a baking stone and use a metal roasting pan for a lid
OR
you can bake your loaf on a parchment paper lined cookie sheet and place a pan with boiling water on the oven rack underneath to create steam


Leave a Reply